MIDI Controller Setup Guide
MIDI Controller Setup Guide
This guide walks you through connecting a MIDI controller to RimuSDR and mapping its knobs and buttons to radio functions.
Lynovation Controllers
RimuSDR MIDI support has been tested with CTR2 devices from Lynovation (https://ctr2.lynovation.com/). The CTR2 is a purpose-built MIDI controller designed with ham radio operators in mind. Lynn at Lynovation has been an absolute pleasure to work with - responsive, knowledgeable, and genuinely invested in making the integration work well. We highly recommend their hardware to any RimuSDR user looking for a polished, reliable MIDI control experience.
Step 1 — Connect Your Controller
Plug your MIDI controller into a free USB port. The operating system will detect it automatically - no additional drivers are normally required.
Step 2 — Open the MIDI Controller Mapping Dialog
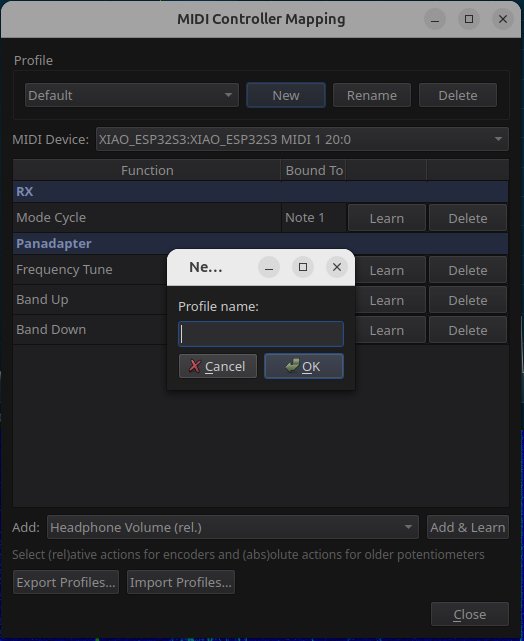
Select the menu Settings | MIDI Controller… to open the MIDI mapping dialog. The dialog is titled "MIDI Controller Mapping" and contains:
Profile section
Manage named mapping sets at the top of the dialog — create, rename, and delete profiles here.
MIDI Device selector
Choose which connected MIDI input device RimuSDR listens to.
Mapping table
Shows all current bindings between MIDI controls and RimuSDR functions.
Add row
Select a function from the drop-down and click
Add & Learn to create a new binding.
Export / Import Profiles
Save your configuration to a JSON file or restore it from a previous export.
Step 3 — Select or Create a Profile
Profiles let you maintain separate mapping sets — for example, one profile per controller model, or different layouts for different operating modes.
Use an existing profile
Select it from the
Profile drop-down at the top of the dialog. The mapping table updates to show that profile's bindings.
Create a new profile
Click
New next to the profile drop-down, enter a name (e.g., "CTR2-MIDI Default"), and click OK. The new profile starts empty.
Rename a profile
Click
Rename, enter the new name, and click OK.
Delete a profile
Click
Delete. Deletion is disabled when only one profile remains — there must always be at least one profile.
Step 4 — Select Your MIDI Device
In the MIDI Device drop-down, choose your controller from the list of detected MIDI input ports. The device selection is stored as part of the profile.
Step 5 — Map Controller Functions (MIDI Learn)
Each function you want to control requires one binding. A binding links a physical control on your controller — a knob, encoder, or button — to a RimuSDR action.
5.1 — Understanding Action Types
Relative (rel.) actions
Designed for
rotary encoders — controls that send a relative increment or decrement value rather than an absolute position. Use these for knobs that spin continuously.
Absolute (abs.) actions
Accept an
absolute value (0–127) from a standard potentiometer or slider. The radio parameter is set directly to the scaled value.
Toggle actions
Respond to any
button that sends a non-zero Note or CC value.
5.2 — Adding a New Mapping
1. Select a function
In the
Add drop-down at the bottom of the mapping table, select the function you want to map. Only unmapped functions are shown.
2. Click Add & Learn
The new row appears in the mapping table with status
"Waiting…" — RimuSDR is now listening for a MIDI message.
3. Move the control
Move the knob or press the button on your controller that you want to assign to this function. RimuSDR captures the MIDI message and updates the
Bound To column.
5.3 — Re-learning an Existing Binding
1. Find the function
Locate the function row in the mapping table.
2. Click Learn
Click the
Learn button on that row. While learning is active the button label changes to
Cancel — click it at any time to abort without changing the existing binding.
3. Move the control
Move the desired knob or press the desired button on your controller. The binding updates immediately.
5.4 — Removing a Binding
Click the Delete button on any row to remove that binding. The function becomes available again in the Add drop-down.
Step 6 — Save and Export Your Configuration
Profiles are saved automatically to RimuSDR's settings file whenever you make changes — no manual save is required. Use Export to create a portable backup or share your configuration.
Export a profile file
Click
Export Profiles…, choose a file location and name (default:
midi_profiles.json), and click Save.
Import a profile file
Click
Import Profiles…, select the JSON file. All profiles in the file are loaded and the previously active profile is restored.