A practical guide to using RimuSDR and RimuDAX — from connecting to your first radio through configuring audio and the integrated CWX keyer. For CAT control, see the RimuCAT Guide.
This guide covers the core workflows in the RimuSDR suite. For installation, see the Installation Guide.
RimuSDR
The primary SDR operating interface for connecting to your radio and controlling the panadapter.
Radio discovery and connection
Local and SmartLink (remote) radios
Panadapter and waterfall controls
Slice management and audio settings
Sub-band privilege visualization
RimuDAX
Routes processed audio and raw I/Q streams between the radio and Linux audio applications.
TX, Mic, and RX channel management
Virtual PulseAudio device naming
Multiple simultaneous DAX channels
I/Q streams for SDR analysis tools
CWX Keyer
Integrated CW keyer for sending text directly from RimuSDR without external hardware.
Integrated CWX memory keyer
Adjustable keyer speed (WPM)
Memory slots for stored text
Instant abort/stop control
Radio Discovery and Connection
The RimuSDR connection UI was designed with hams in mind who have more than one radio on the local network or who operate through multiple SmartLink accounts. Whether you have two radios on your bench or access to club and personal radios over SmartLink, the connection workflow is intended to make switching between them straightforward without credential juggling.
Local Radio Discovery
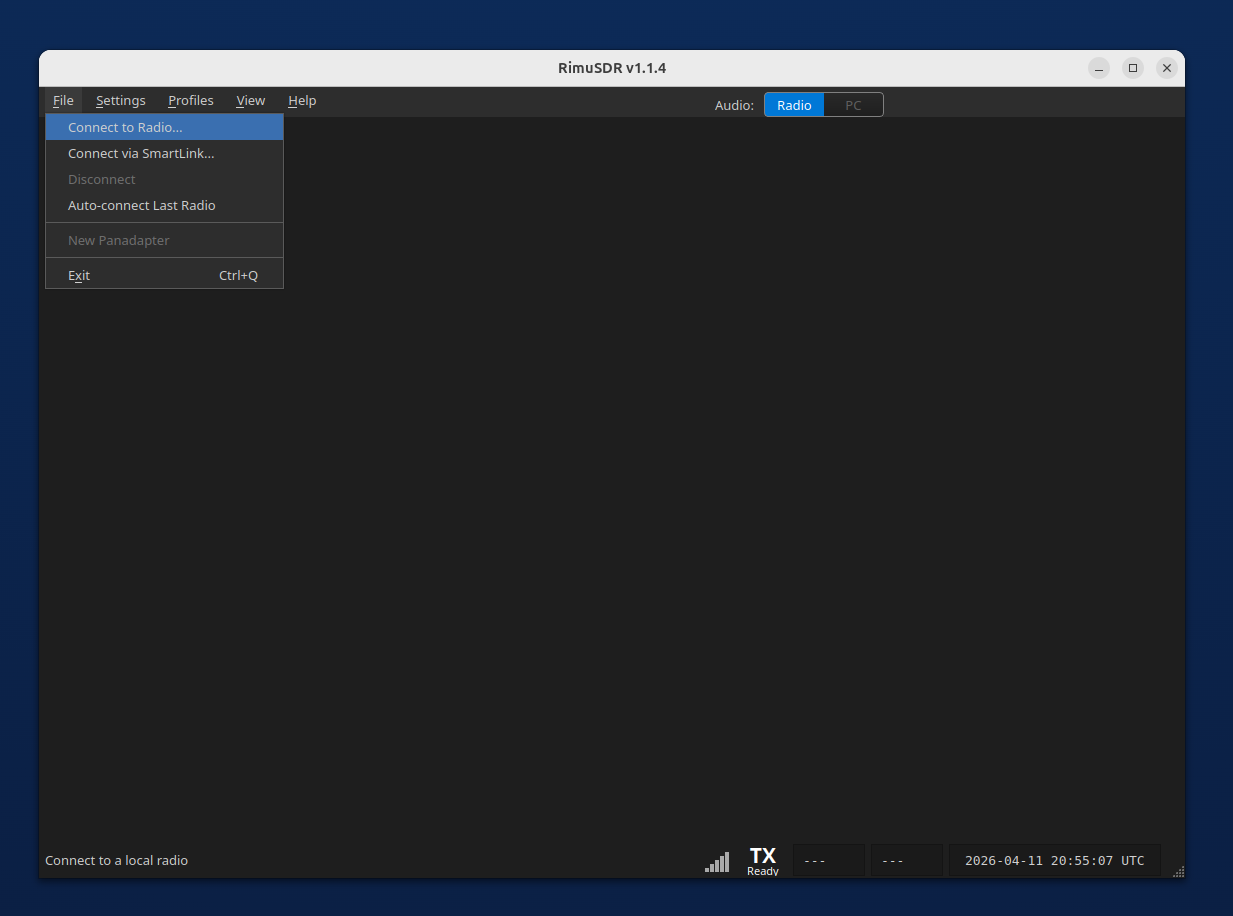
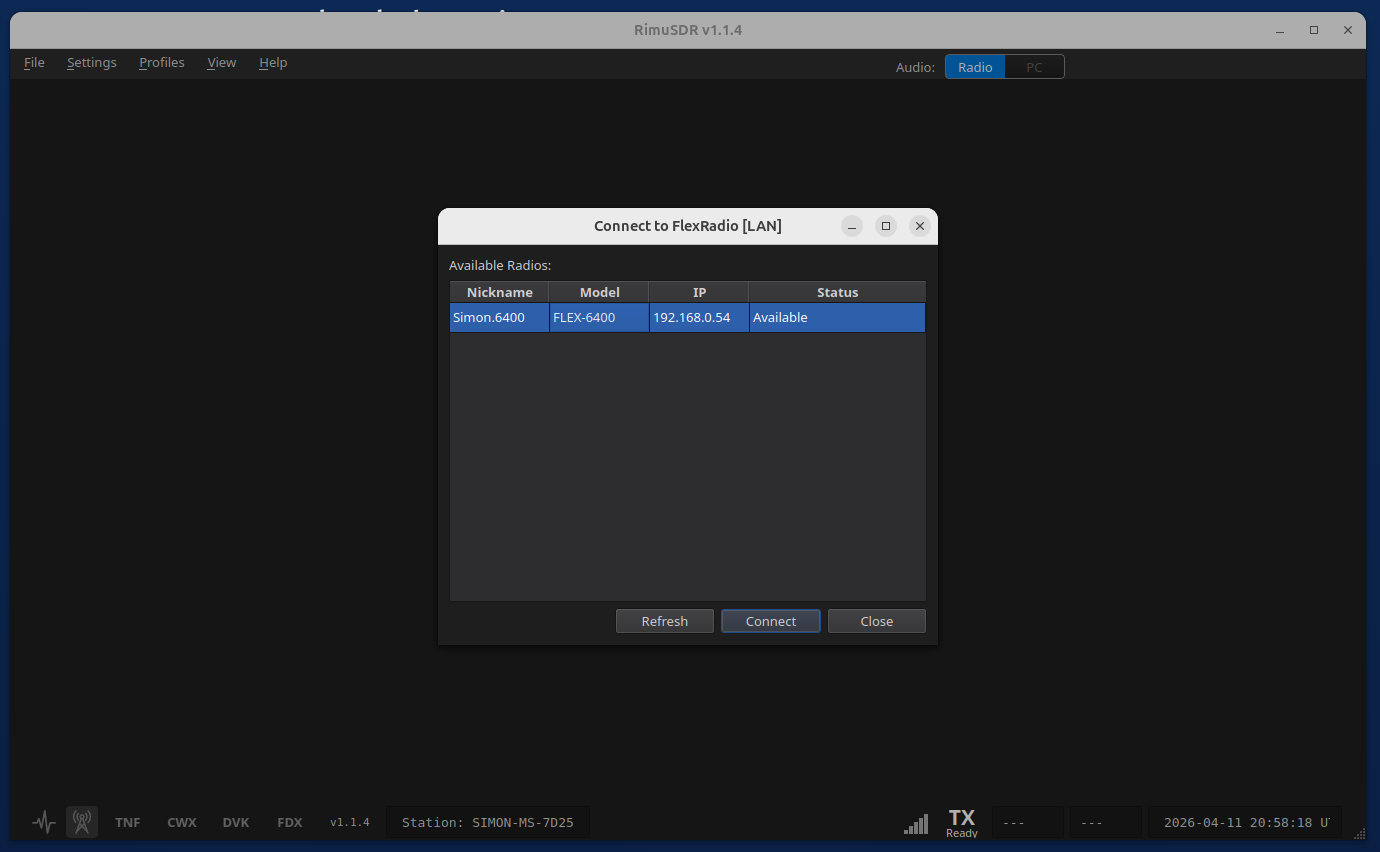
RimuSDR discovers FlexRadio 6000, 8000, and Aurora series radios on the local network automatically — no IP address entry required. Use File › Connect LAN Radio to open the local radio browser, then select the radio you want to connect to from the list. The computer running RimuSDR must be on the same subnet as the radio — for example, if the radio has an IP address of 192.168.0.10, the machine running RimuSDR must have an address in the 192.168.0.* range.
Use File › Connect LAN Radio to open the local radio browser. The option is available whenever RimuSDR is not already connected to a radio.RimuSDR lists all FlexRadio radios found on the local network. Select the radio you want to connect to and click Connect. If a radio does not appear, confirm it is powered on and reachable on the same network segment.
SmartLink Connection
SmartLink lets you connect to a FlexRadio over the internet through FlexRadio's cloud service. SmartLink Manager allows you to register and deregister radios.
The SmartLink Manager displays configuration details for radios registered in your FlexRadio SmartLink account, making it straightforward to verify connection settings and select the radio you want to use.
MultiFLEX shared operation
FlexRadio supports MultiFLEX, allowing multiple operators to connect to the same radio simultaneously. Each operator gets independent slices, panadapters, and DAX access. RimuSDR participates in MultiFLEX sessions automatically when the radio permits it.
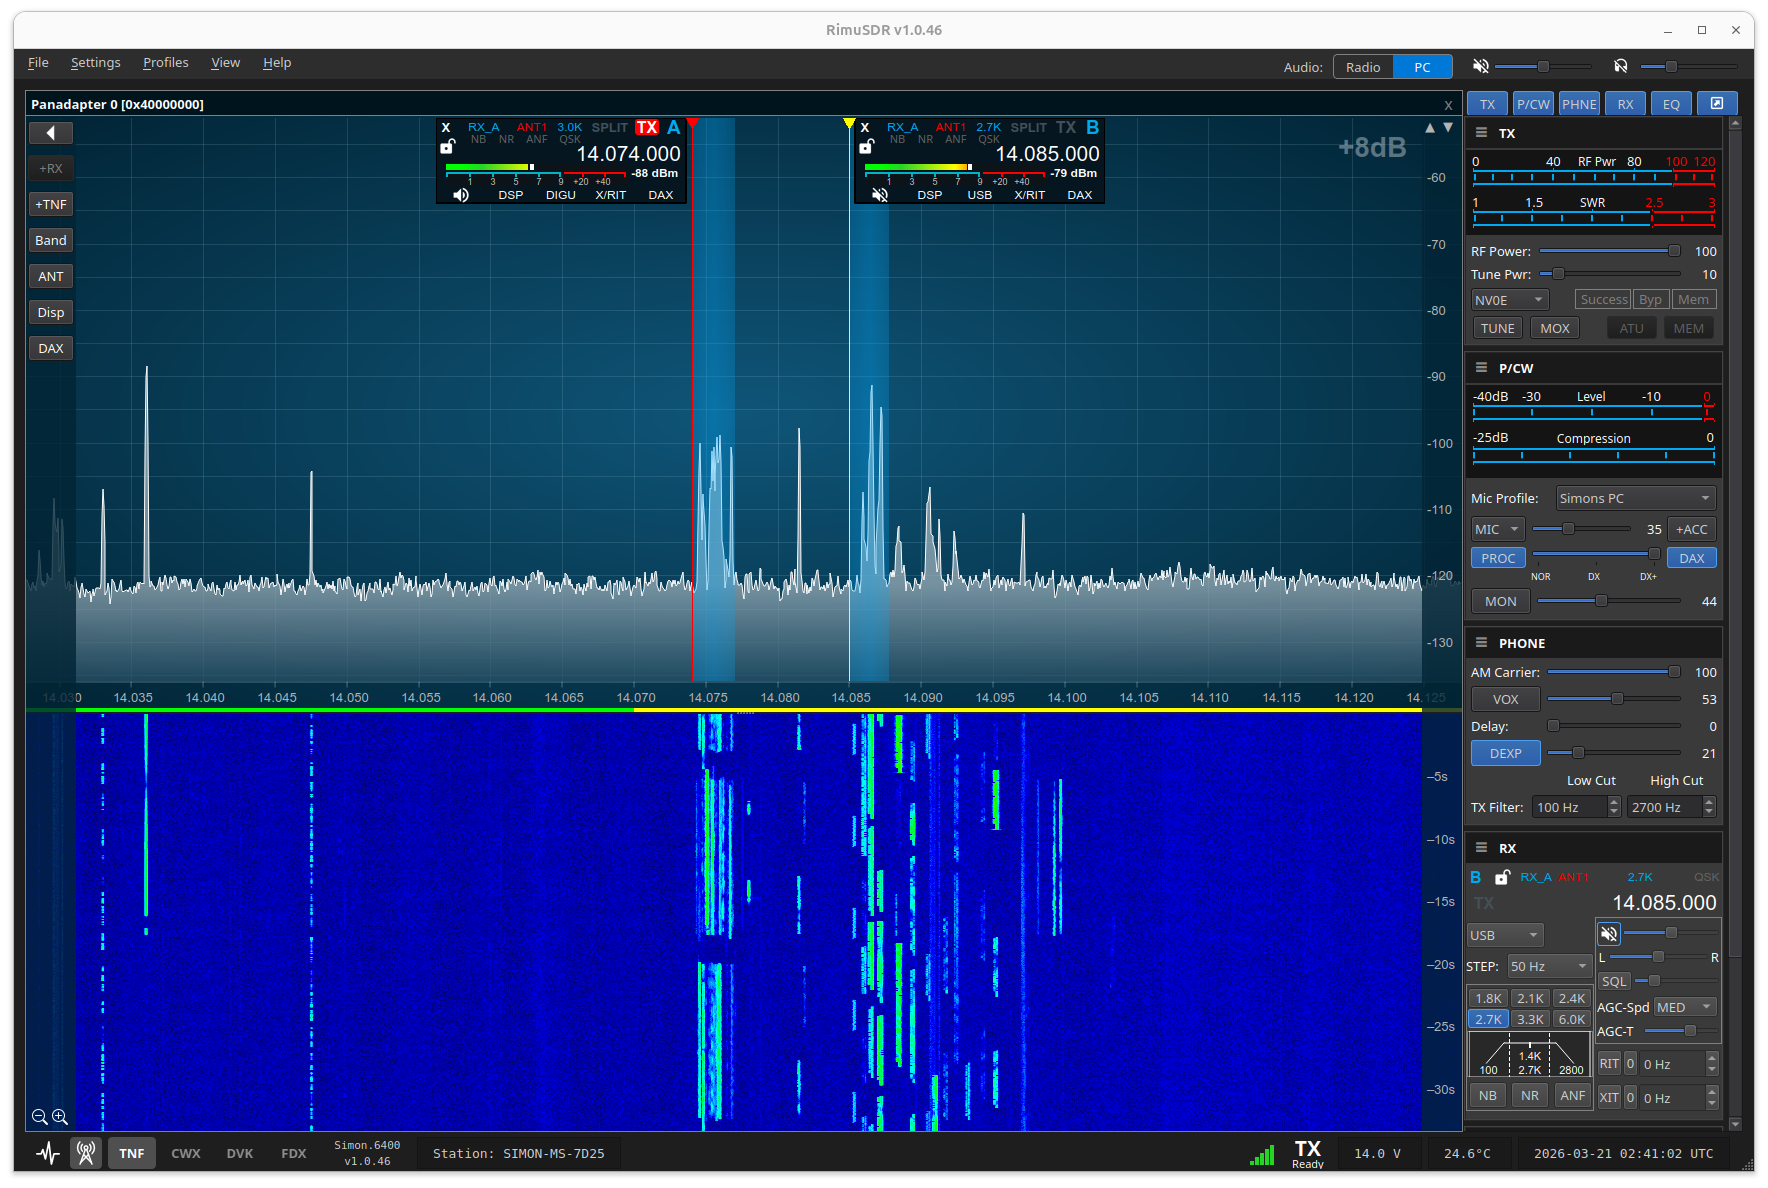
Panadapter and Waterfall Controls
The panadapter displays the RF spectrum across the selected band. The waterfall below it shows signal history over time, making it easy to identify activity and spot signals.
Panadapter display
The panadapter shows real-time signal strength across the visible bandwidth. Use the band selector to switch bands or enter a frequency directly to jump to a specific spot. The reference level and display range can be adjusted to suit band conditions.
Waterfall
The waterfall display shows RF activity over time to help identify CW, digital, and SSB signals at a glance. Waterfall speed and color gradient can be adjusted to match your operating preferences and screen brightness.
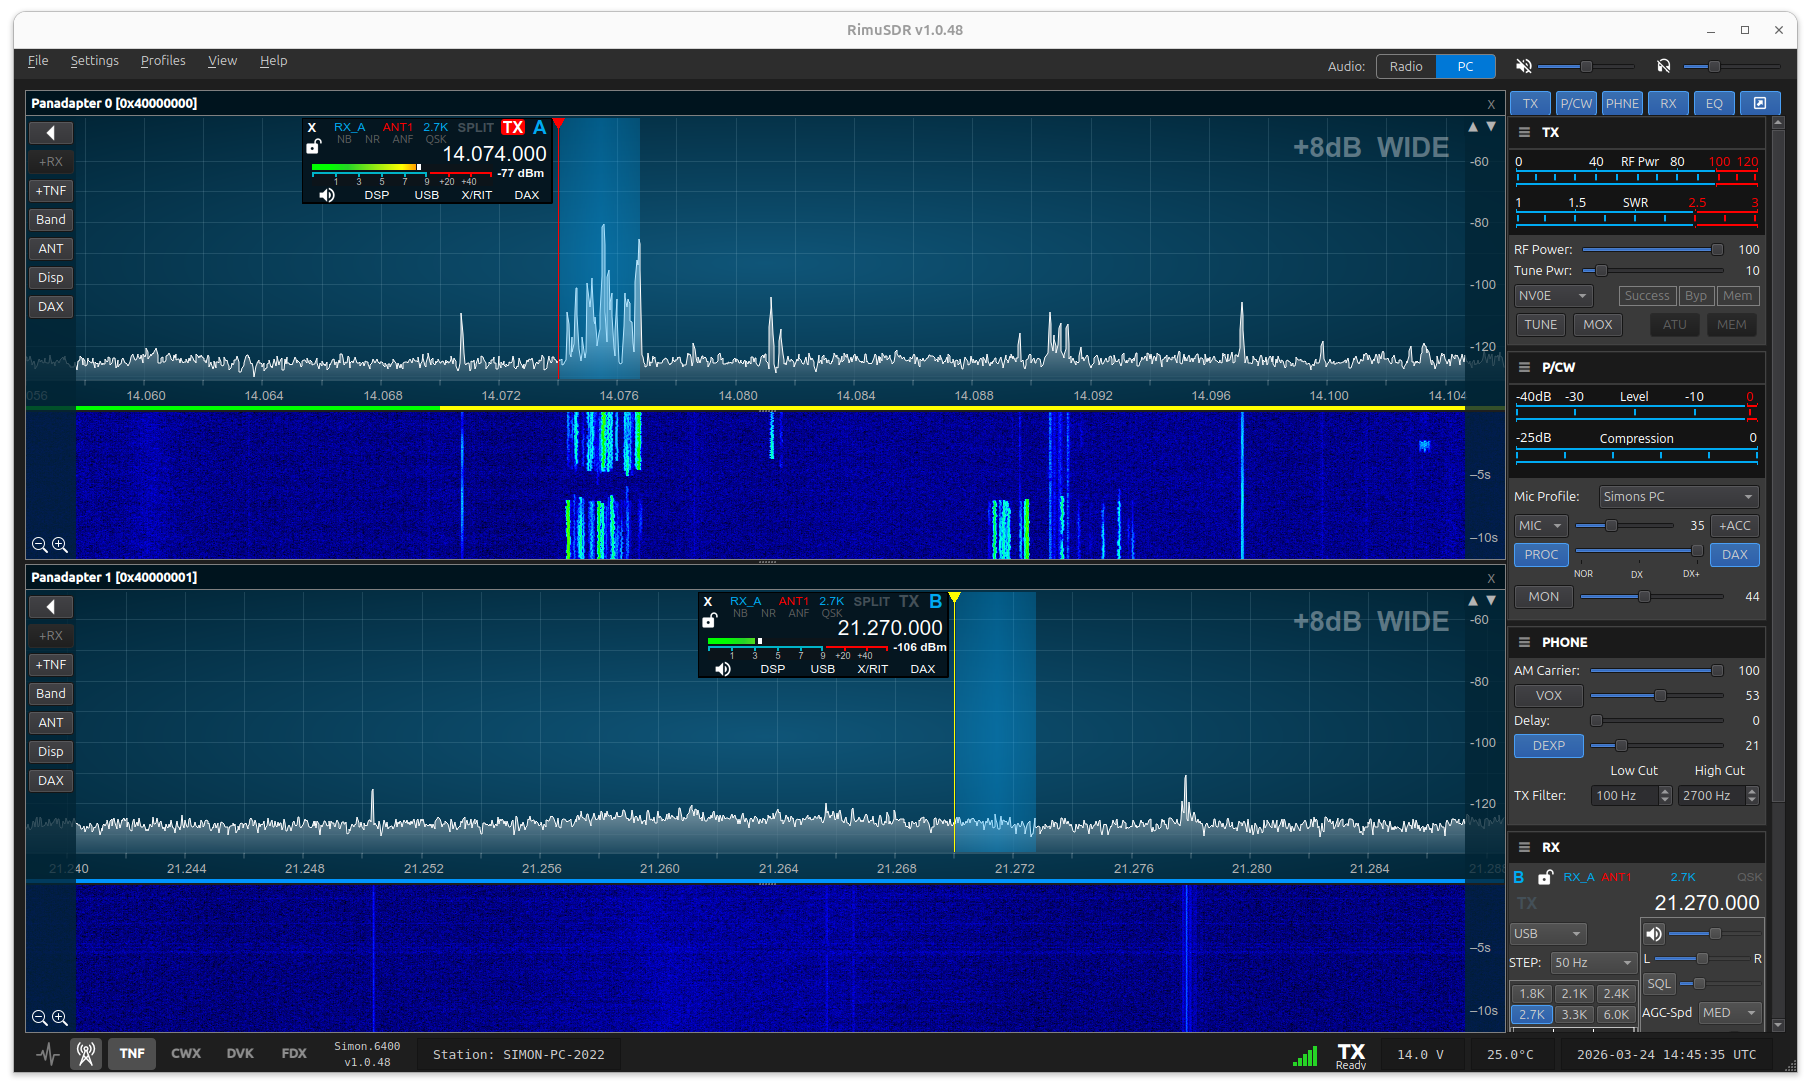
Multiple panadapters
RimuSDR supports up to eight simultaneous panadapters (subject to radio capability). Each panadapter is independent and can be placed on a different band, making it easy to monitor multiple bands at once.
Slice receivers
Each panadapter can host one or more slice receivers. A slice defines the receive frequency, mode (USB, LSB, CW, AM, FM, etc.), filter width, and audio routing. Slices can be moved by clicking in the panadapter or by typing a frequency.
Tracking Notch Filters (TNFs)
TNFs can be placed anywhere in the panadapter to attenuate a specific interfering carrier or signal. Drag a TNF to reposition it or adjust its width to fit the interference. TNFs operate in the digital domain on the radio itself.
Spots
Spot data can be displayed on the panadapter, showing the callsign and frequency of spotted stations as overlays on the spectrum. This makes it quick to click on a spot and move the active slice to that frequency.
RimuSDR main operating view. The panadapter shows the current band spectrum and the waterfall displays recent signal history below it.Two panadapters displayed simultaneously, allowing the operator to monitor two different bands at once without switching views.
Sub-Band Privilege Visualization
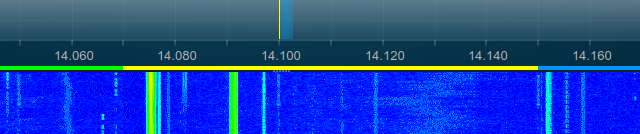
A horizontal indicator below the panadapter frequency scale shows which license class segments are in view, providing at-a-glance confirmation that you are operating within your authorized sub-bands.
Color-coded sub-bands
Each license class (Technician, General, Amateur Extra, etc.) is assigned a distinct color that appears as a band below the frequency scale. As you pan or zoom the panadapter, the color bands update to reflect the privileges for the visible segment.
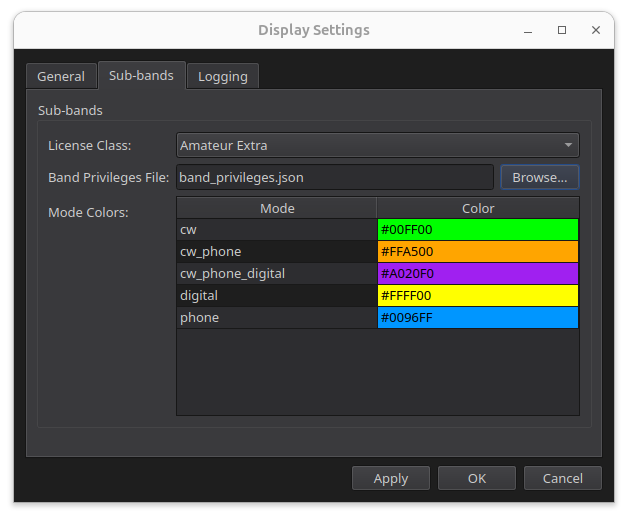
Customizable regions
RimuSDR ships with a US privileges file but the configuration is fully replaceable. Edit the file to match your region's band plan, define custom frequency ranges, specify license classes, and assign any colors you prefer. The file uses a straightforward text format.
Granular segment definition
Sub-band definitions can be as fine-grained as needed. Common practice in the US plan is to define separate segments for voice, CW, RTTY, and digital modes within each band. Any number of named segments can be defined at any frequency granularity.
The colored band above the panadapter shows sub-band privileges for the visible spectrum, giving immediate visual feedback on authorized operating segments.The sub-band configuration interface where the license class and band privilege file is defined. By default, the US region file is selected, but other regions can be chosen. A custom file for any region can also be loaded. The JSON file defines the license classes, frequency ranges, and display colors for each sub-band.
Flex Control Knob
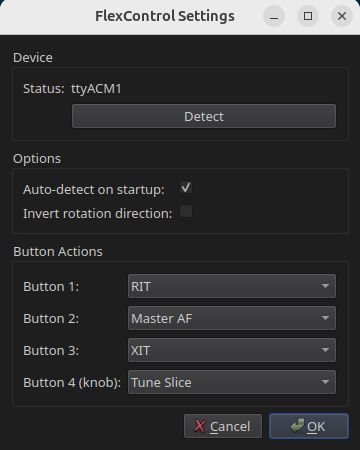
The FlexControl Multi-function Tuning Knob is designed to provide amateur radio operators with a tactile, ergonomic, and highly customizable physical dial for controlling Software-Defined Radios (SDRs). It connects via USB and is supported in RimuSDR for intuitive frequency tuning, mode selection, and other radio controls. The knob's functionality can be configured to suit individual operating preferences, making it a versatile tool for SDR operation on Linux.
Important! In linux, the Flex Control Knob requires that the user is a member of the dialout group to access the necessary serial ports. If you are not seeing the control knob in RimuSDR, please check your user permissions and add yourself to the dialout group if needed. Use the following command exactly as written, then log out and back in for the change to take effect:
sudo usermod -aG dialout $USER
The Flex Control Knob settings interface in RimuSDR, showing configurable options for each button. When the button is pressed, the knob then controls the value of that button option.
DAX Audio Configuration
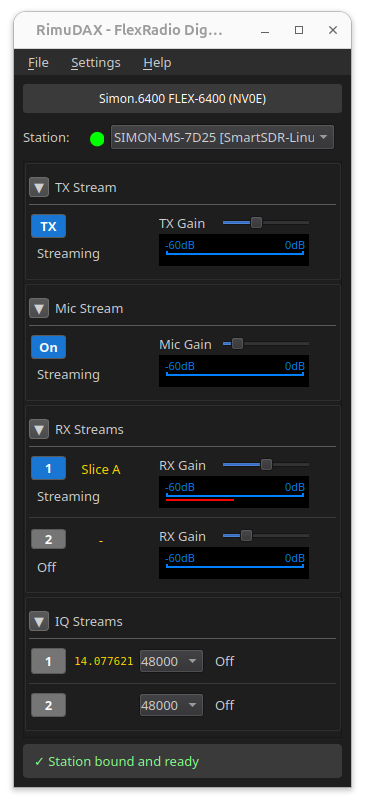
RimuDAX creates virtual PulseAudio devices that route processed audio between the radio and Linux applications. Enable the channels you need and select the matching device names in your digital-mode software.
Connecting RimuDAX
Start RimuDAX after RimuSDR is connected and the DAX channel is active on the desired slice. RimuDAX will list the same station that RimuSDR is connected to. Select it and click Connect.
TX channel
The TX channel carries transmit audio from your Linux application to the radio. Enable TX before enabling any RX channel. The corresponding PulseAudio device is named flex.dax.tx — set this as the audio output in your digital-mode software.
Mic channel
The Mic channel routes microphone audio from Linux into the radio for voice operation over DAX. Enable Mic when you want to use a Linux audio input (headset, USB microphone) as the radio's transmit microphone source.
RX channels (RX1–RX8)
Each enabled RX channel corresponds to a DAX channel number set on a slice in RimuSDR. For example, if the slice has DAX channel 1 selected and the DAX button active, enable RX1 in RimuDAX. The PulseAudio device is named flex.dax1.rx1 — set this as the audio input in your digital-mode software.
Confirming audio flow
The RX channel level meters in RimuDAX should respond to signals received on the corresponding slice in RimuSDR. A silent meter when signals are present usually means the DAX button is not enabled on the slice, or the wrong DAX channel number is selected.
PulseAudio device names
All RimuDAX virtual devices appear in PulseAudio with the flex. prefix, making them easy to identify in system audio tools such as pavucontrol. You can verify connections and monitor levels in pavucontrol while RimuDAX is running.
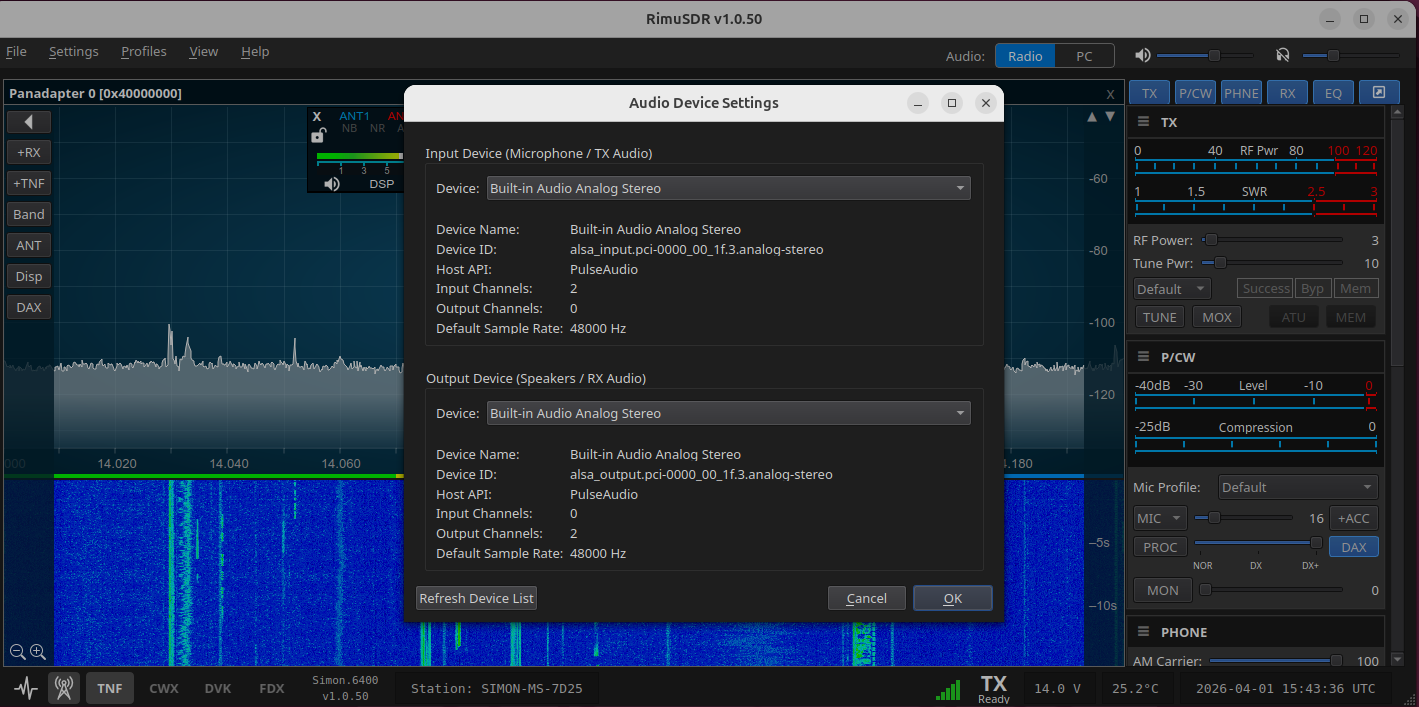
The RimuDAX interface showing TX, Mic, and RX channel controls. The level meters confirm audio is flowing between the radio and the Linux audio system.RimuSDR audio device settings, where the system playback device for the SDR receiver audio can be selected independently of the DAX audio path.
DAX setup notes
Order mattersRimuSDR must be connected and the DAX button active on the slice before RimuDAX is started, otherwise RimuDAX will not see the audio stream.
DAX channel numbersThe DAX channel number selected on the slice in RimuSDR must match the RX channel enabled in RimuDAX. Slice DAX channel 1 maps to RX1, channel 2 to RX2, and so on.
Same stationRimuDAX must be connected to the same station (radio) as RimuSDR. In most home setups only one station will appear in the list.
CWX Keyer Operation
RimuSDR includes an integrated CWX keyer for sending CW text directly from the application without an external keyer or hardware interface.
Sending text
Type CW text into the CWX text field and press Enter or click Send. The text is queued and sent to the radio as CW at the current keyer speed. The radio handles all timing and spacing at the hardware level.
Keyer speed
The keyer speed (WPM) is displayed and can be adjusted while text is queued. Changes take effect at the next character boundary so the current character is always sent at the speed it was started at.
Memory slots
The CWX keyer provides memory slots for storing frequently sent text such as a CQ call, signal report, or contest exchange. Assign text to each memory slot and recall it with a single click during an operating session.
Abort sending
The Stop (abort) button clears the CWX transmit queue immediately and drops the radio out of transmit. Use Stop any time you need to interrupt a send in progress.
CWX notes
Mode requirementThe slice must be set to CW or CW-U mode before using CWX. Attempting to send CW while the slice is in a phone or digital mode will not produce the expected output.
Radio-side processingAll CW timing is processed by the FlexRadio hardware, not in software, producing clean sidetone and accurate timing at any speed.
SidetoneThe CW sidetone comes from the radio's audio output. Adjust sidetone level and pitch using the radio's profile or front-panel controls.
Related Guides
Step-by-step integration guides for connecting digital-mode applications to RimuSDR.