HaliKey
The HaliKey MIDI is a USB adapter for Morse paddles, a straight key, or a PTT switch.
Step 1 - Connect the hardware
-
Connect your paddles, key, or PTT switch to the HaliKey jack.
Refer to the HaliKey User Guide, section 2.2, for the wiring.
-
Connect the HaliKey to a USB port on the computer.
Step 2 - Load the template
-
Start RimuSDR.
-
Select Settings | MIDI Controller....
-
Confirm the MIDI Device list has the HaliKey selected.
- If the HaliKey is your only controller, RimuSDR selects it automatically.
- If it is not selected, select the device with
HaliKeyin its name. - If the list is empty, click the refresh button beside the list.
-
Select Mapping | New from template | HaliKey.
-
A message reports that the template loaded with 4 bindings. Click OK.
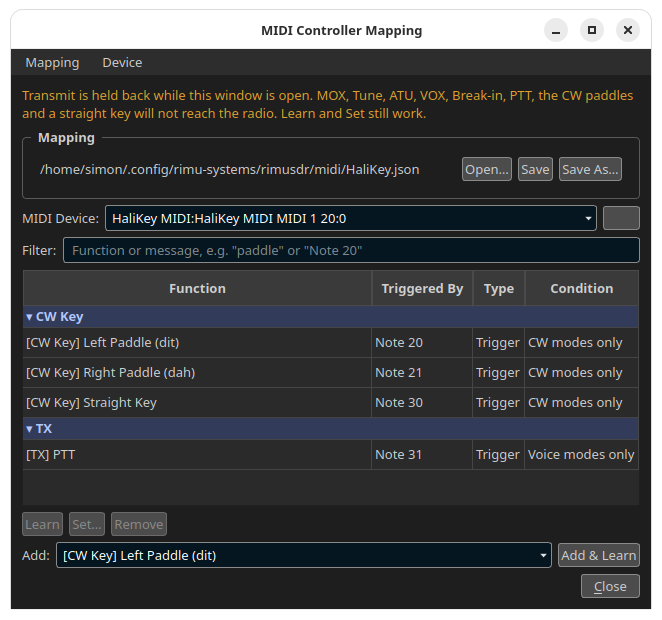
The table now shows:
| Function | Triggered By |
|---|---|
| [CW Key] Left Paddle (dit) | Note 20 |
| [CW Key] Right Paddle (dah) | Note 21 |
| [CW Key] Straight Key | Note 30 |
| [TX] PTT | Note 31 |
The HaliKey sends two notes when the tip contact closes: Note 20 and Note 31. The Condition column decides which row acts. In CW modes the paddle rows act, and in voice modes the PTT row acts.
Step 3 - Save the mapping
-
Click Save.
A file dialog opens, because the template is not saved to a file yet.
-
Keep the suggested folder and file name,
HaliKey.json. -
Click Save.
RimuSDR now remembers that this file belongs to the HaliKey, and loads it automatically the next time you connect the adapter.
Step 4 - Test the paddles
You can test without a radio. The sidetone then plays from the computer.
-
In the CW panel, on the right of the main window, set Iambic on.
-
If a radio is connected, set the slice mode to CW.
-
Press a paddle.
-
Confirm you hear the sidetone.
The radio transmits with Breakin on
With Breakin on, the radio transmits each time you press a paddle. Connect an antenna or a dummy load first. Make sure the frequency is clear and that you are permitted to transmit.
-
To transmit, set Breakin on in the CW panel.
-
Press a paddle. The radio transmits.
Step 5 - Test the PTT switch
The radio transmits during this test
Connect an antenna or a dummy load first. Make sure the frequency is clear and that you are permitted to transmit.
-
Set the slice mode to USB or LSB.
-
Push and hold the PTT switch. The radio transmits.
-
Release the PTT switch. The radio stops transmitting.
The PTT function does not act in CW mode, and the paddle functions do not act in voice modes. This is by design, and the Condition column shows it.
Using a straight key
A straight key connects between tip and sleeve. The HaliKey then sends Note 20, which the template binds to the left paddle. Move that note to the straight key function:
-
Select the row [CW Key] Left Paddle (dit).
-
Click Remove.
-
Select the row [CW Key] Straight Key.
-
Click Set....
-
Enter
20and click OK. -
Click Save.
-
In the CW panel, set Iambic off.
The straight key now keys the radio directly.
To go back to paddles, load the HaliKey template again, save it, and set Iambic on.