Fldigi
Fldigi reaches your FlexRadio through RimuDAX for audio, RimuCAT for CAT
control, and pavucontrol for PulseAudio routing.
The steps below are in the order that works reliably on Linux.
Before you start
| Component | Provides | Settings |
|---|---|---|
| RimuSDR | The radio connection and DAX channel | Slice DAX channel 1, DAX enabled |
| RimuDAX | The audio streams | TX, Mic and RX1 channels enabled |
| RimuCAT | CAT control | A CAT port on a virtual serial device |
| pavucontrol | PulseAudio routing | Fldigi's streams routed to the DAX devices |
| Fldigi | The digital mode modem | RigCAT rig control, PulseAudio sound |
Audio routing happens outside Fldigi
Fldigi on Linux does not select the RimuDAX channels in its own device
lists for this setup. The stream routing is done externally through
PulseAudio, with pavucontrol.
Step 1 - Install pavucontrol
Many distributions include pavucontrol already. If the command is missing,
install it:
Step 2 - RimuSDR: connect and enable DAX
-
Open RimuSDR and connect to the FlexRadio.
-
On the slice you want Fldigi to use, set the DAX channel selector to
1. -
Confirm DAX is enabled on the radio.
RimuDAX picks up channel 1 when it connects.
Step 3 - RimuDAX: enable the audio channels
-
Open RimuDAX and connect to the radio. Select the same station as RimuSDR.
-
Enable the TX, Mic, and RX1 channels.
-
Confirm the RX1 level meter moves in response to signals from the radio.
If it does not move, confirm the DAX button is active on the slice in RimuSDR.
Step 4 - RimuCAT: create a serial CAT port
RimuCAT creates a virtual serial port for Fldigi. No physical serial cable is required.
-
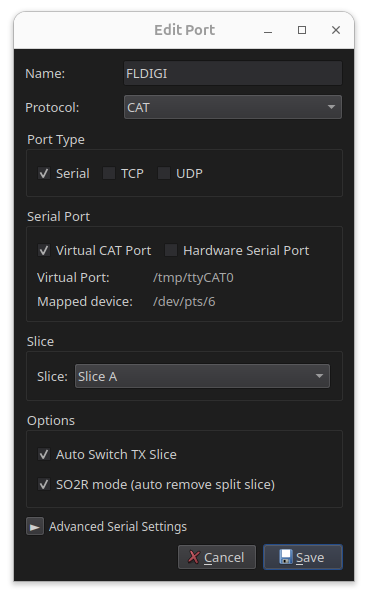
Open RimuCAT and connect to the radio. Select the same station again.
-
Create a new port and give it a name, for example
FLDIGI. -
Set the protocol to CAT.
-
Set the port type to Serial, then select a Virtual CAT Port.
-
Select the slice you assigned the DAX channel to, usually slice A.
-
Check Auto switch TX slice and SO2R mode.
-
Leave the Advanced Serial settings alone.
-
Click Save.
-
Select the port, click Edit, and note the Mapped Device path.
RimuCAT assigns this when the port is created, so it is only visible after you save and reopen the dialog. You need it in Step 6.
Step 5 - Download the RigCAT XML file
Fldigi uses RigCAT XML files to define the command protocol for each radio. Eight files are available for FlexRadio, one per slice.
-
Open the Fldigi FlexRadio XML files page: https://sourceforge.net/projects/fldigi/files/xmls/flex/
-
Download the file that matches the slice you configured in Step 4.
Most users need
SmartSDR_SliceA.xml, because slice A is the usual choice. -
Save the file and remember the location. You reference it in the next step.
Step 6 - Configure Fldigi
-
In Fldigi, go to Configure › Config Dialog.
-
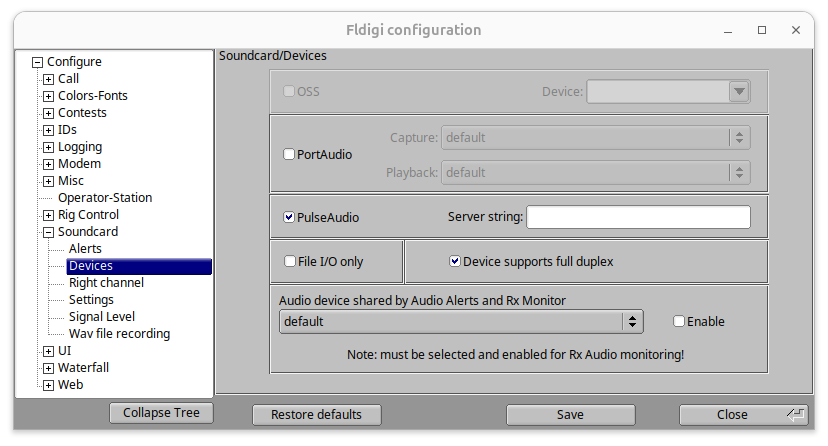
Go to Soundcard › Devices and select PulseAudio. Change nothing else on that page.
-
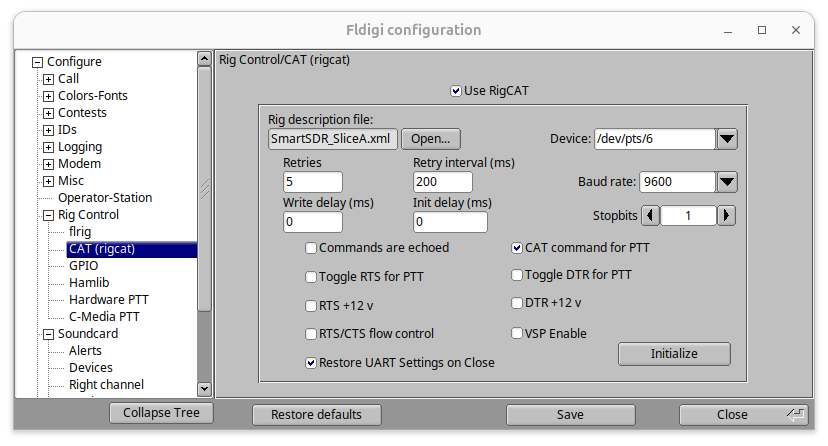
Go to Rig control › CAT (rigcat).
-
Check Use RigCAT.
-
Select the rig description file
SmartSDR_SliceA.xml. -
Enter the Mapped Device path from Step 4 into Device.
The path looks like
/dev/pts/4. You cannot select mapped devices from the drop-down, so type the path in. -
Select CAT command for PTT.
-
Click Initialize.
-
Click Save, then Close.
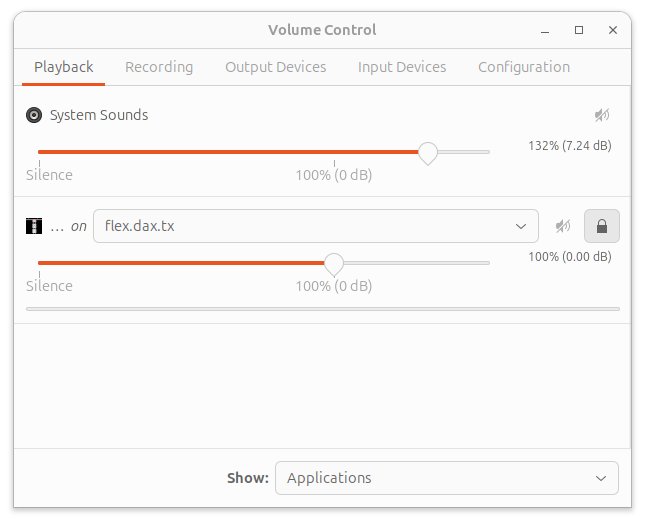
Step 7 - Route the audio in pavucontrol
-
Open
pavucontrol. -
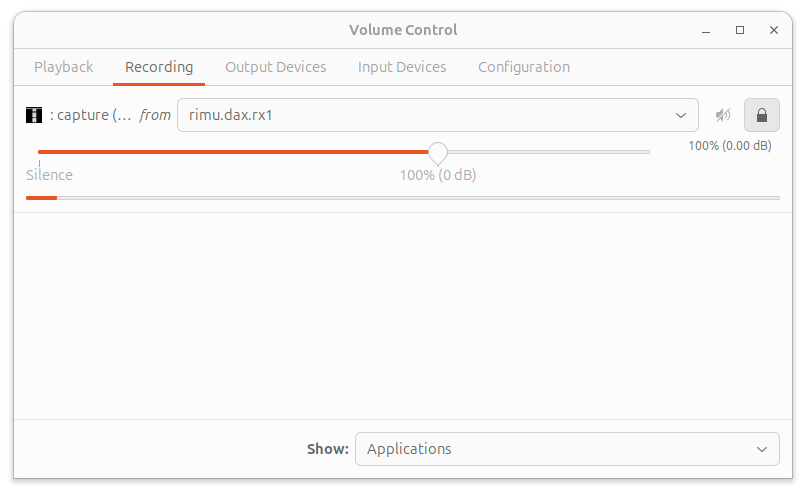
Route Fldigi's recording stream to
rimu.dax.rx1.This connects Fldigi's receive audio to the DAX RX1 stream.
-
Route Fldigi's playback stream to
rimu.dax.tx.This sends Fldigi's transmit audio back through RimuDAX to the radio.
More help
FlexRadio publishes an Fldigi configuration guide for Windows. Some setup steps differ from Linux.
If you are still stuck, contact support.