WSJT-X
WSJT-X reaches your FlexRadio through two components of the RimuSDR suite: RimuDAX for audio routing, and RimuCAT for CAT control.
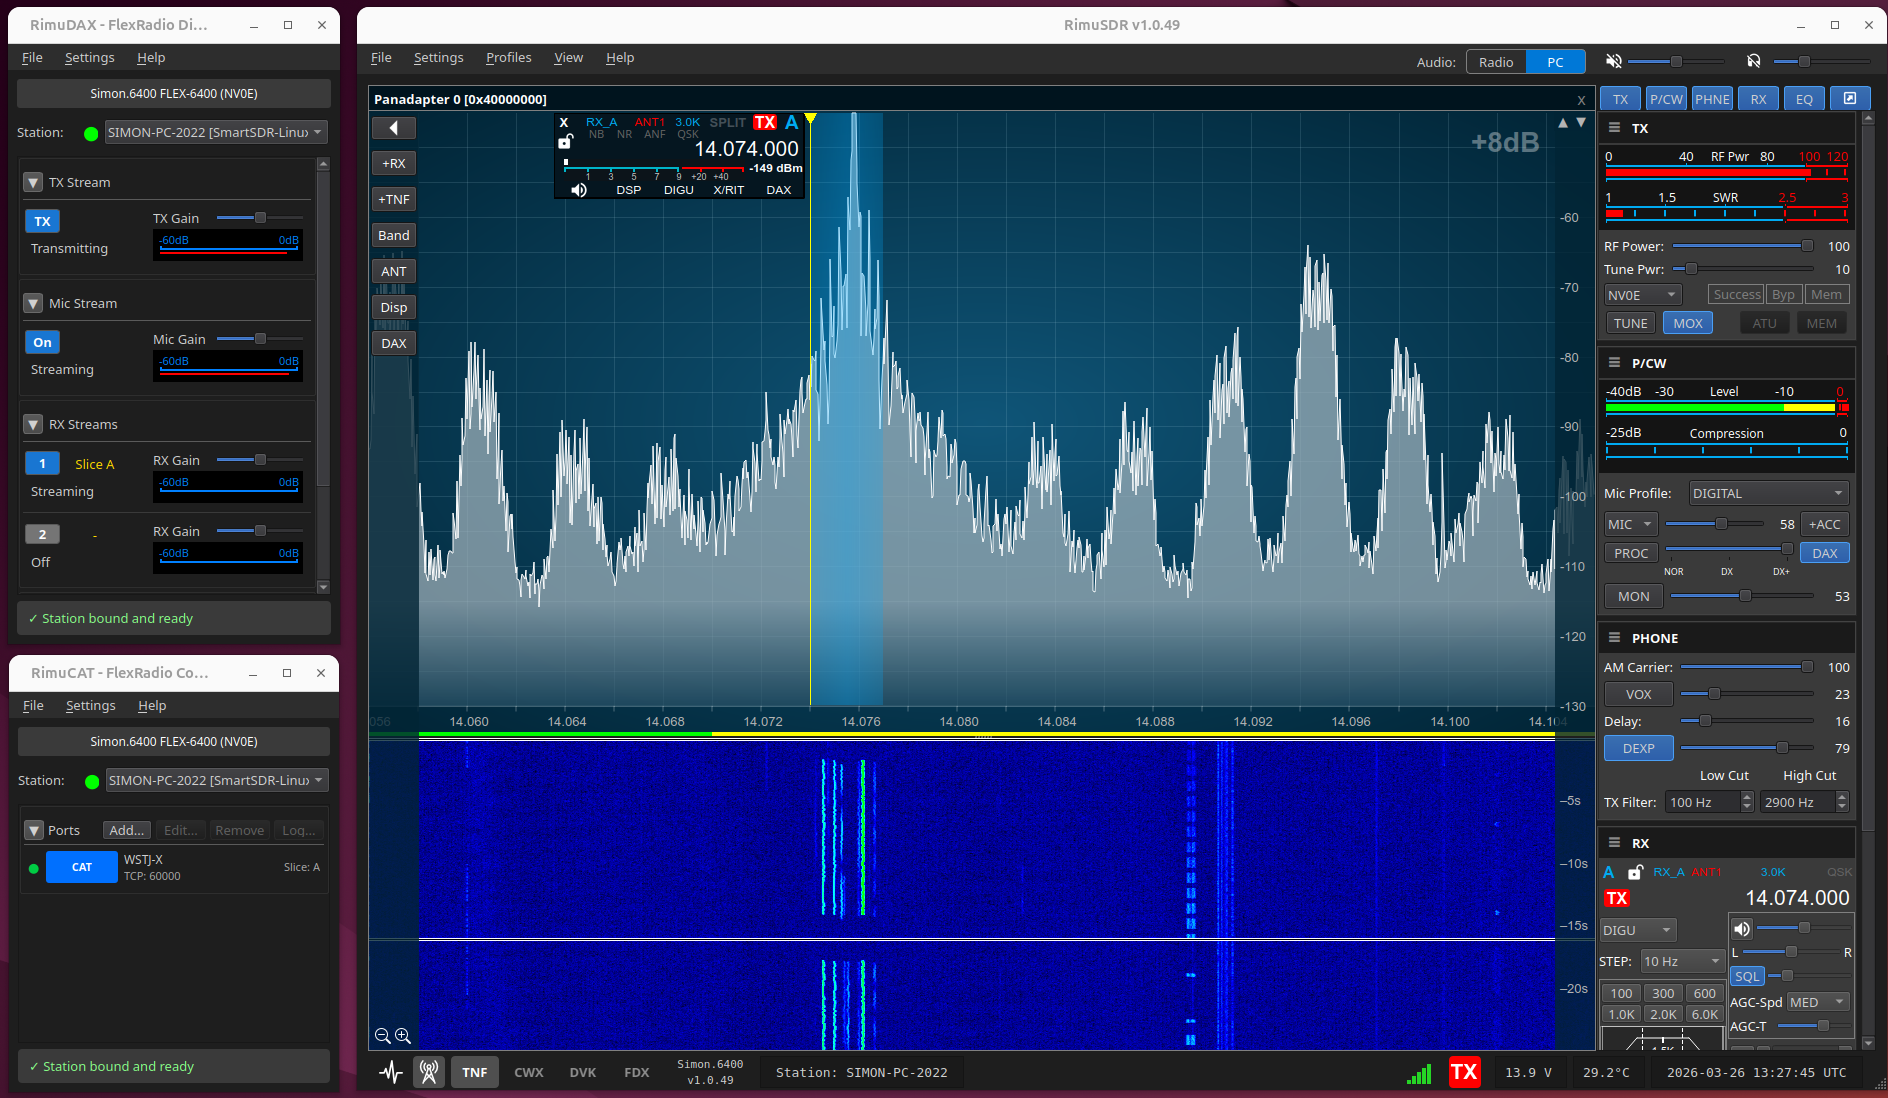
Before you start
Three components work together, and the order they are started in matters:
| Component | Provides | Settings |
|---|---|---|
| RimuSDR | The radio connection and the DAX channel | Slice DAX channel 1, DAX button active |
| RimuDAX | The audio path | TX, Mic and RX1 channels enabled |
| RimuCAT | The CAT control path | CAT port over TCP on 60000 |
WSJT-X then connects to localhost:60000 as a FlexRadio 6xxx rig.
Step 1 - RimuSDR: connect and enable DAX
-
Open RimuSDR and connect to the FlexRadio.
The radio appears in the station list, and the main SDR view opens.
-
On the slice you want WSJT-X to use, set the DAX channel selector to
1.This assigns audio channel 1 to that slice.
-
Press the DAX button on the slice.
RimuDAX picks up channel 1 when it connects.
Step 2 - RimuDAX: enable the audio channels
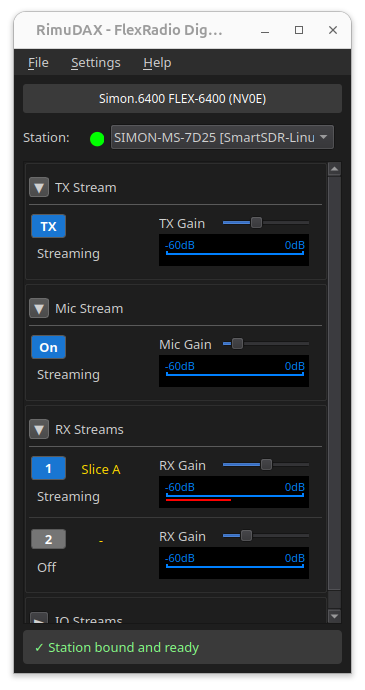
Toggle TX and RX on, or the streams will not exist
Enabling the channels is what creates the audio streams. If you do not enable them, you cannot select them later in WSJT-X.
RimuDAX saves the state of these toggles, so the streams are created automatically the next time it starts.
-
Open RimuDAX and connect to the radio. Select the same station that RimuSDR is connected to. In most setups there is only one station in the list.
-
Enable the TX, Mic, and RX1 channels.
These give transmit audio out to the radio, microphone input, and the DAX channel 1 receive audio that WSJT-X decodes.
-
Confirm the RX1 level meter moves in response to signals from the radio.
If it does not move, confirm the DAX button is active on the slice in RimuSDR.
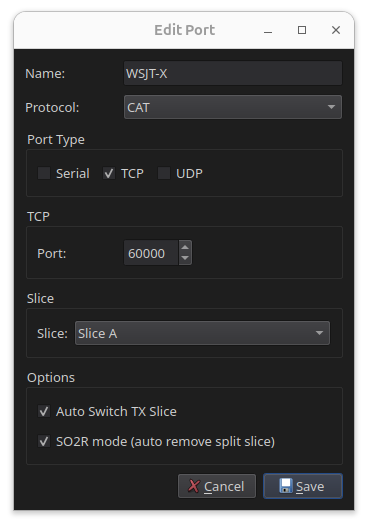
Step 3 - RimuCAT: create a TCP CAT port
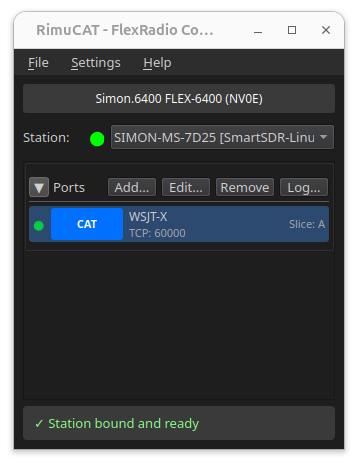
RimuCAT exposes the radio's frequency, mode, and PTT to WSJT-X over a TCP network port. No physical serial cable is required.
-
Open RimuCAT and connect to the radio. Select the same station again.
-
Add a new CAT connection.
-
Set the type to TCP.
-
Set the port to
60000. -
Select the slice.
RimuCAT begins listening on that port.
Step 4 - WSJT-X radio settings
-
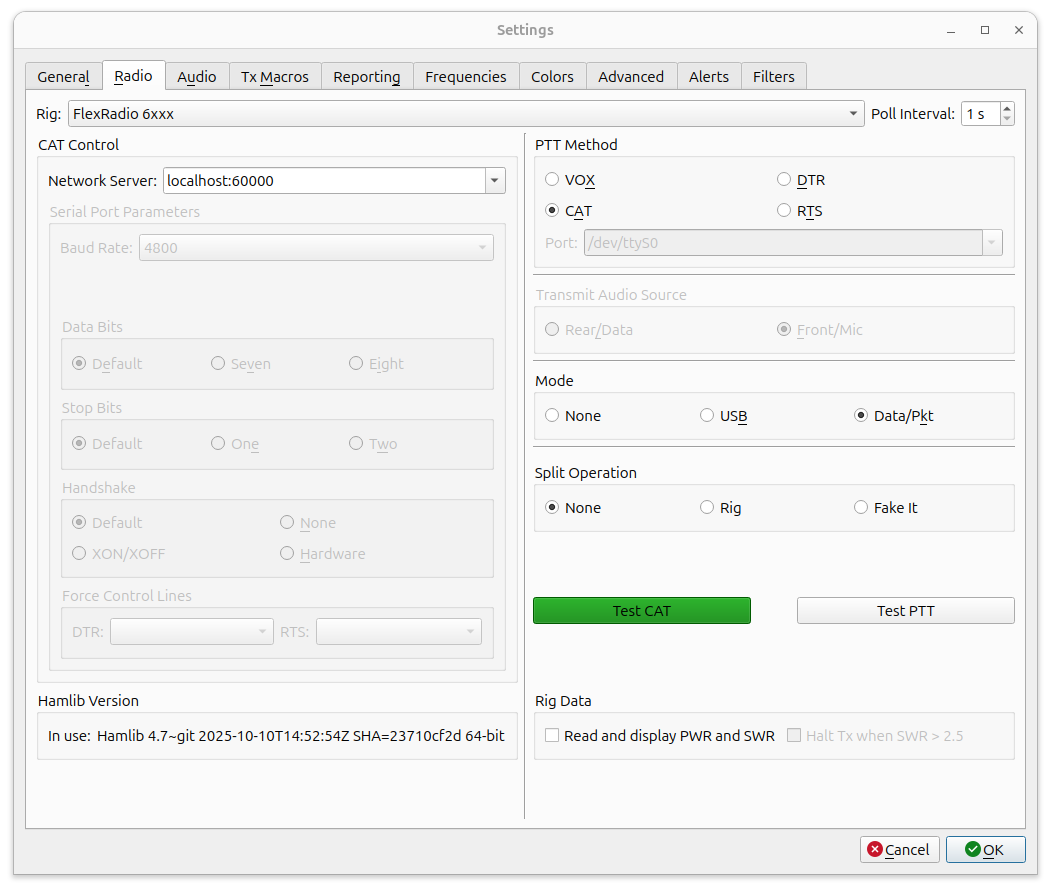
In WSJT-X, go to File › Settings › Radio.
-
Set Rig to FlexRadio 6xxx.
This tells WSJT-X which command protocol to use.
-
Set Network Server to
localhost:60000. -
Set PTT Method to CAT.
-
Set Mode to Data/Pkt.
-
Set Split Operation to None.
-
Click Test CAT. The button turns green when the connection works.
RimuCAT shows the active connection from WSJT-X after a successful Test CAT.
Step 5 - WSJT-X audio settings
-
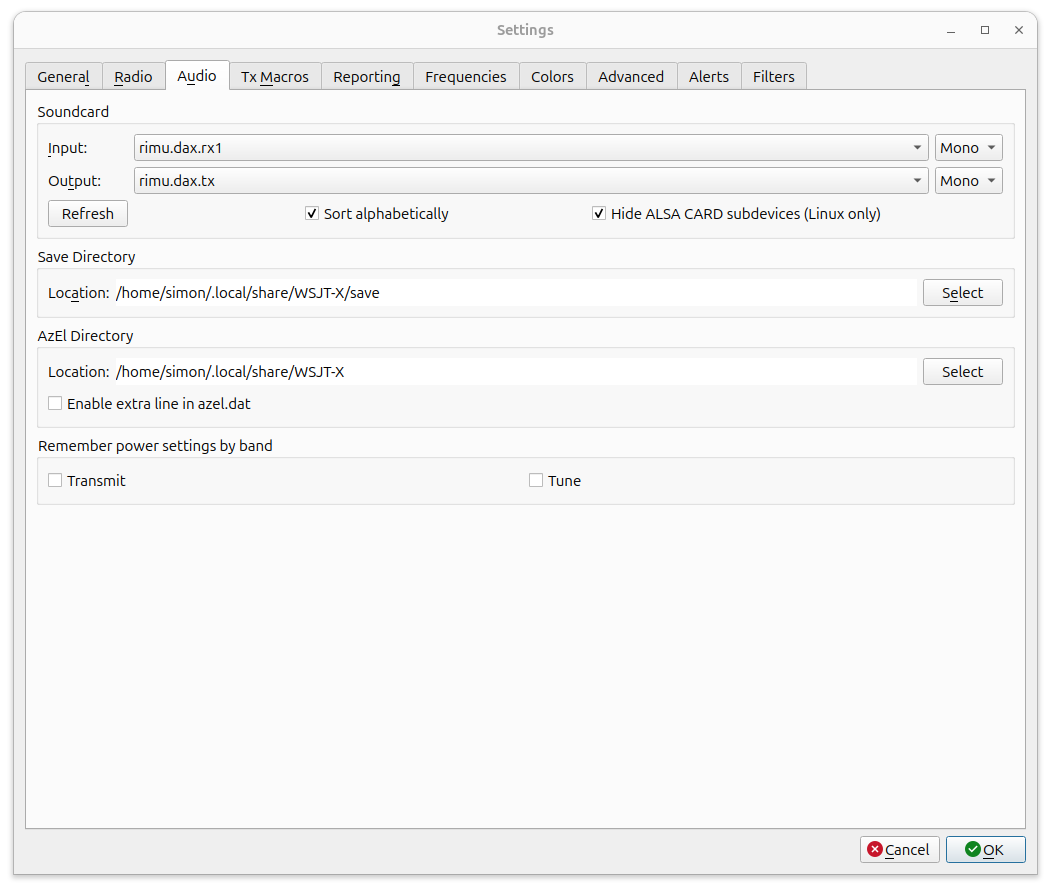
In WSJT-X Settings, click the Audio tab.
-
Set Input to
rimu.dax.rx1.This is the RimuDAX channel 1 receive stream, the audio WSJT-X decodes.
-
Set Output to
rimu.dax.tx.This routes WSJT-X transmit audio back through RimuDAX to the radio.
Troubleshooting
- RimuSDR connected first
- RimuSDR must be connected, with the DAX button active on the slice, before RimuDAX starts.
- DAX channel set to 1
- The slice DAX channel selector in RimuSDR must be
1, so RimuDAX picks up the correct stream. - TX, Mic and RX1 all enabled
- Confirm the RX1 meter responds to received signals before going on.
- RimuCAT listening on 60000
- The TCP listener must be active before WSJT-X connects.
- Test CAT is green
- A failure usually means RimuCAT is not running, or the wrong port was entered.
- Audio devices correct
- Input
rimu.dax.rx1, outputrimu.dax.tx. - Same station throughout
- RimuDAX and RimuCAT must both be connected to the same station as RimuSDR.